Windows 7
it allows you to have multiple users on the same computer under their own individual names or accounts. This allows each individual user to have their own location on the computer where they can store their personal documents, pictures, videos, saved games, and other personal data. This also allows the owner / Admin of the computer to assign certain accounts the ability to perform administrative tasks like installing software, while limiting other user’s abilities.
This tutorial will walk you through creating a new account in Windows 7
1. Click on the Start button. This is the small round button (![]() ) in the lower left corner of your screen that has a Windows flag on it.
) in the lower left corner of your screen that has a Windows flag on it.
2. Click on the Control Panel menu option. 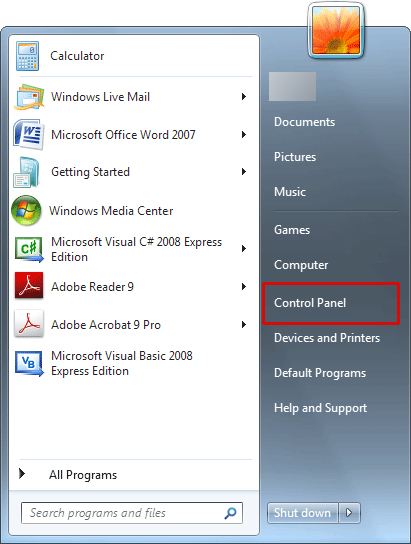
3. When the control panel opens you will see a screen similar to the picture below .
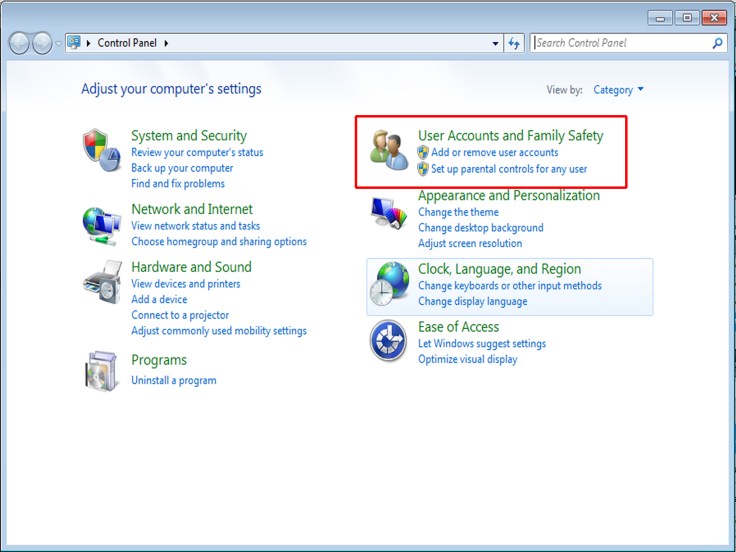
Click on the Add or remove user accounts control panel option.
4. You will now be in the Manage Accounts control panel as shown on picture below.
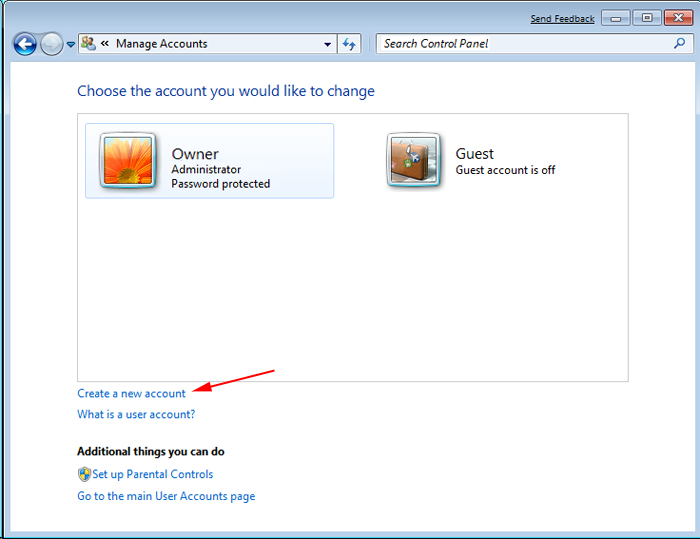
5. This screen shows all the accounts currently on your computer. To create a new account, click on the Create a new account option as shown by the red arrow above.
6. You will now be at the Create New Account screen.

In the New account name field enter the name of the account you would like to create. You then need to decide what privileges you want to give to the account from two types. An Administrator account has full access to the computer and can make all changes, install software, and create and delete accounts. The other type of account is Standard user and has limited privileges as to what settings and changes it can make to the computer. It is suggested that all users are set as a Standard User accounts and have one administrator account that you can control. This will protect your computer from malware and other harmful activities.
When you have finished selecting a name and the type of account you wish to setup, you should click on the Create Account button.
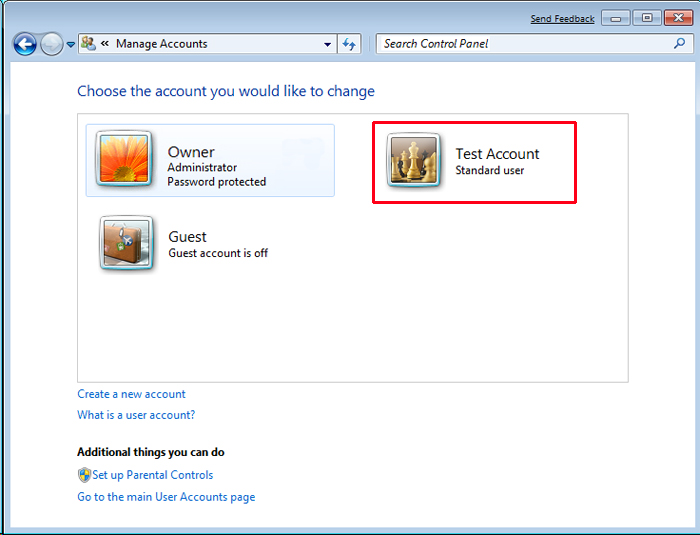
7. Your new account will have been created and you will see it listed in the Manage Accounts screen.
Windows 8
introduces the ability to create and login as a Local account or a Microsoft account. A Local account is an account that is located on your PC or laptop and is not integrated into any of Microsoft’s online services. This account is the same as what was used in previous Windows versions (windows 2000, XP, Vista, 7). A Microsoft account previously known as a Windows Live ID, is an online account which you register with Microsoft and allows you to integrate all of Microsoft’s online services into Windows 8 or 10. These services include the Windows Store, SkyDrive, Calendar, Hotmail, and the ability to sync your account settings and preferences to other Windows 8 or 10 machines you may use.
To create a new user in Windows, please make sure you are logged in as an Administrator. Now,
go to the Windows 8 Start Screen, click on WINKEY + Q and in search window type Add User.
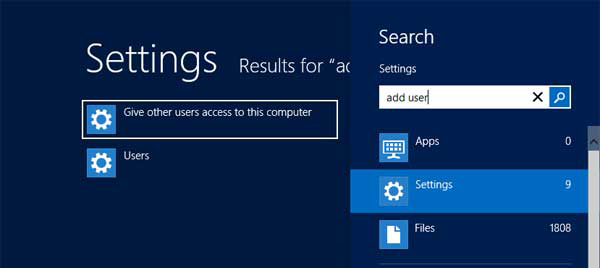
When the search results appear click on the Settings category.
click on the option labeled “Give other users access to this computer“, which will open the User Settings screen.
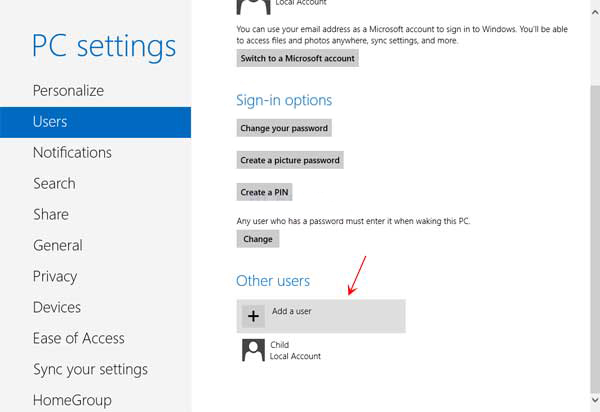
click on the Add User option as shown above. You will now be at a screen asking you to enter the user email address.

By default, the above screen asks you to enter an email so that you create a Microsoft account. If you wish to create a Microsoft account, enter your email address and click on the Next button. If the email address is not an existing Microsoft account you will be take to the page to register one.
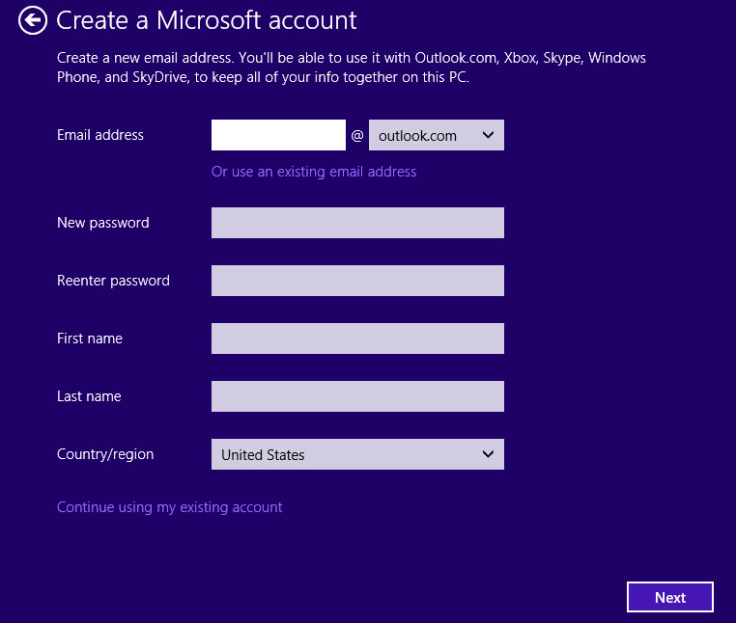
When the registration process is completed, Microsoft will send an email to the inputted email address. In this email will be a link that you need to click on in order to verify that you want this Microsoft account used on this computer.
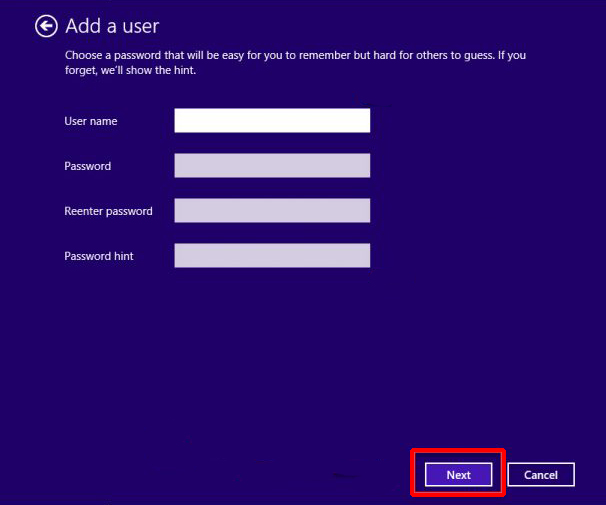
If you do not want to have Microsoft account, simply click on “sign in without a Microsoft account” , when prompted with, choose local account

it will take you to the screen where computer will ask you to enter username and password.
Once done, next and Finish.
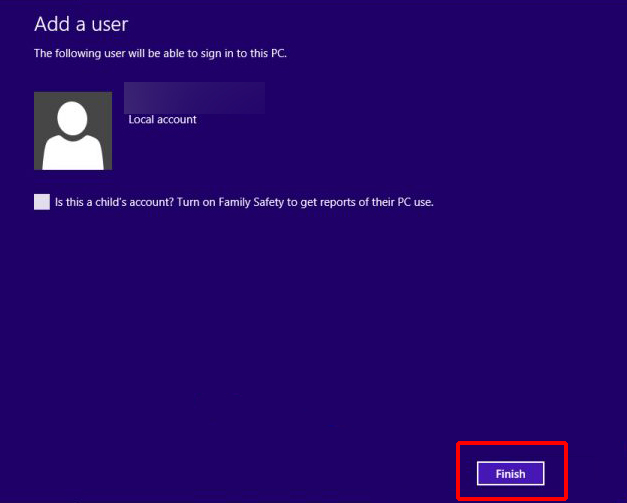
the local account is created.
How To Create New Local User Account In Windows 10
right click on start icon on
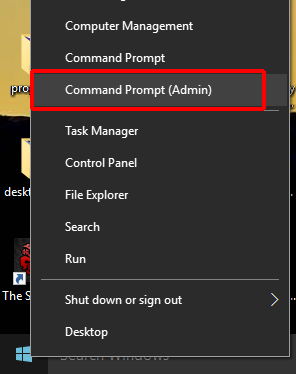
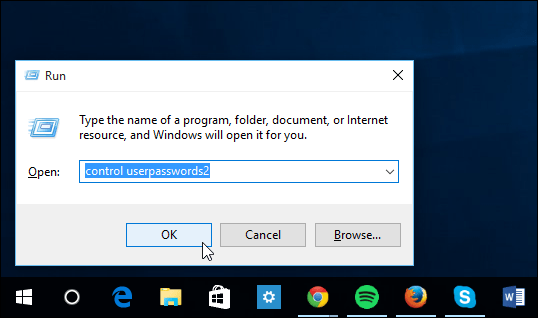
Alternately you can use the keyboard shortcut Windows Key + R to bring up the Run box. Once you have it open, type: control userpasswords2 and hit Enter or click OK.
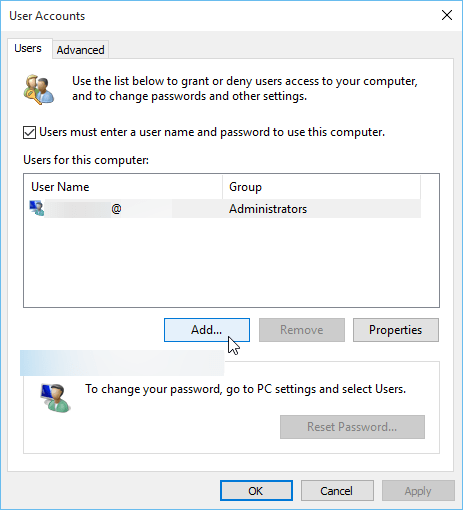
The User Account screen will open — Click the Add button.
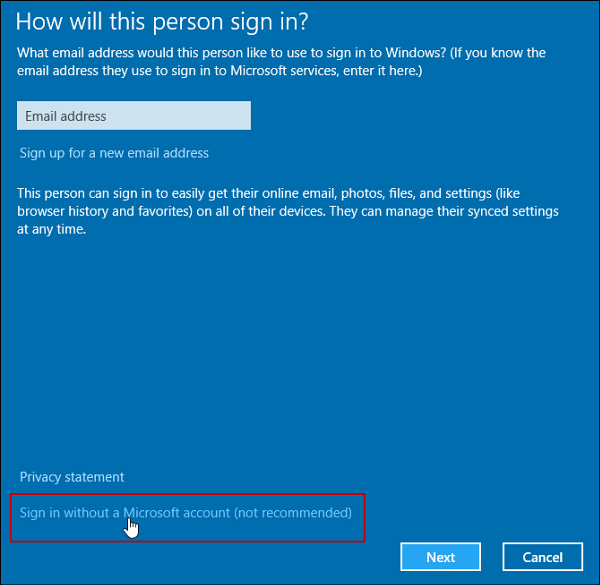
The next screen will ask how this person will sign in. At the bottom of this screen select: Sign in without a Microsoft account (not recommended) and click Next.
The next screen will describe the differences between a Microsoft account and a Local account. Select the Local account button at the bottom.

Now you can enter in the user’s name, password, and password hint. Click Next

That’s it! Click “Sign out and finish”

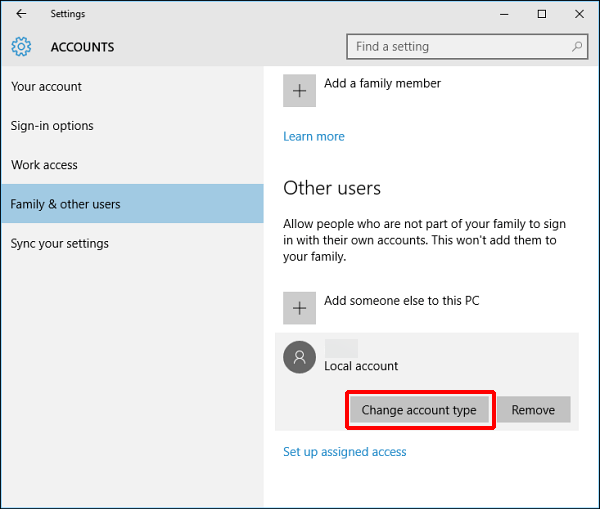
When creating a new user account, it will be a Standard user by default, which is better for security, but you can change it to Administrator if you’re creating the local account for yourself. To do that, go to Settings > Accounts > Family & other users. From there click on “Change account type“.
Next just change the account type from “Standard User” to “Administrator” and click OK.
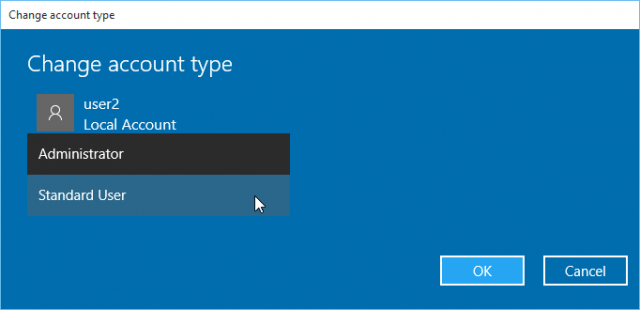
Note that you can remove the account from here as well.
