
before you start messing with your music library, simply download ringtones from http://audiko.net/
Drag the tone from the desktop to the Tones section,
Click on the iPhone icon and go to Tones -> Sync Tones -> Selected Tones -> and select your tone and sync your device. Once done
check your phone, head to Settings -> Sounds -> Ringtones and select your new ringtone from the list.
Using songs from your music library
There is a pretty simple way to turn any song in your iTunes library into a custom ringtone and I’ll show you how.
Step 1.
Open iTunes on your computer and find a song that you want to snip. We are going to be taking a 30 second clip (max for ringtone is 30s), so make sure to select a song with a catchy chorus or some type of melody that would make a good ringtone.
Step 2.
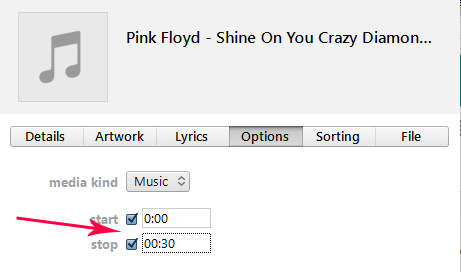
Right-click on the song and select ‘Get Info” followed by the “Options”. In the Options tab, you will see Start and Stop. Here is where you will enter your start and stop time for the ringtone. You may need to listen to the song a few times to take note of exactly when to start and stop your clip.
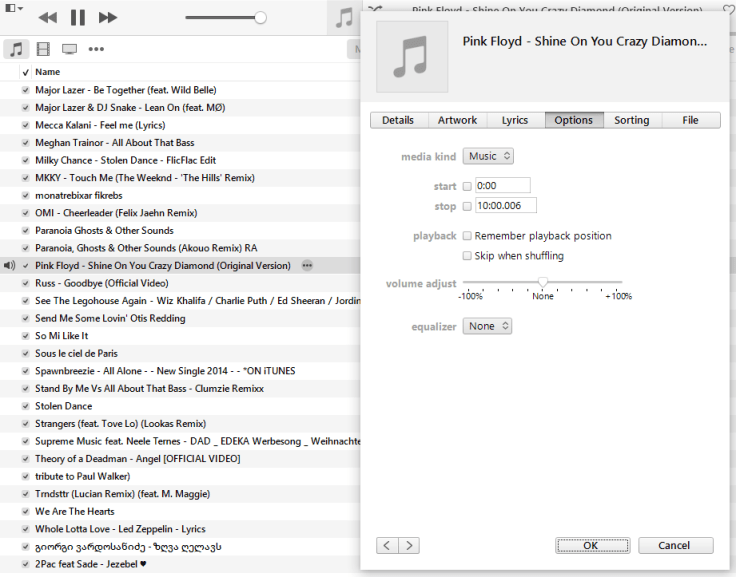
When you are done with your timing, press OK.
Step 3.
Create an AAC version of your song by right-clicking and selecting Create AAC Version. You will have the original and the AAC version in your library now. I would suggest changing the title of the AAC version to make identifying it easier.

Now that we have the original and the AAC version, you can change the original song back to its regular start and stop time. Just uncheck the boxes next to Start and Stop.
Note, if you see an error you have an older song that was formatted differently.
From iTunes Support: “Older purchased songs are encoded using a Protected AAC format that prevents them from being converted. If you need to convert these to another format, follow the instructions in this article to upgrade them.”
Follow the steps laid out in that article or pick a more recent song; 2010 or later.
Step 4.
Right-click on your new AAC song clip and select Show in Finder. From the Finder folder, right-click your newly created song and select Get Info.
Step 5.
On Mac – In the Get Info menu, under “Name and Extension”, change the extension for .m4a to .m4r and save your changes.


On PC – iTune’s will create additional file in the music list (one that you just modified), drag it to desktop, change extension from m4a to .m4r
(To show or hide file name extensions
-
Open Folder Options by clicking the Start button
 , clicking Control Panel, clicking Appearance and Personalization, and then clicking Folder Options.
 -
Click the View tab, and then, under Advanced settings, do one of the following:
– To hide file name extensions, select the Hide extensions for known file types check box, and then click OK.
– To show file name extensions, clear the Hide extensions for known file types check box, and then click OK.)
Step 6.
Connect your iPhone to your computer and open iTunes. Select the three dots next to your phone and click Tones in the drop-down menu. 
Step 7.
Drag the tone from the desktop to the Tones section.

Step 8.
Click on the iPhone icon and go to Tones -> Sync Tones -> Selected Tones -> and select your tone and sync your device.
Step 9.
Back on your phone, head to Settings -> Sounds -> Ringtones and select your new ringtone from the list

Leave a comment