
For most users, this can be the simplest way to upgrade because it means that your existing programs and files stay wherever they’re. Sometimes, however, you do not wish to try to do standard or regular OS upgrade. Perhaps you would like to start out from completely clean machine, or even you would like to install El Capitan on a machine that does not have OS X installed and delete all the junk accumulated in time. For those users, the simplest way is to try to do a clean installation, erasing the disc and putting in from scratch.
If you would like to try to a clean install of OS X El Capitan on your mack — or on a replacement HDD / SSD — it can be done in several easy steps.
If you have done the clean install processes within the previous few years, these directions will look familiar. (That’s because they’re nearly the same as past years, several changes were made to OS name, User interface, some additional features were added and flatter design is used). With a little time, it’s quite straightforward to create a bootable copy of OS X El Capitan that you just will run from a USB stick.
Note: A clean install can erase all of the contents on your hard drive. Make sure to back up or copy your important files, settings and apps before continuing.
First
To do a clean install of OS X El Capitan, you will need a blank USB flash drive that’s a minimum of 8GB in size. You will be using this drive fully for OS X El Capitan, therefore do not waste a bigger drive if you’ve got an 8GB on hand.
Download OS X El Capitan
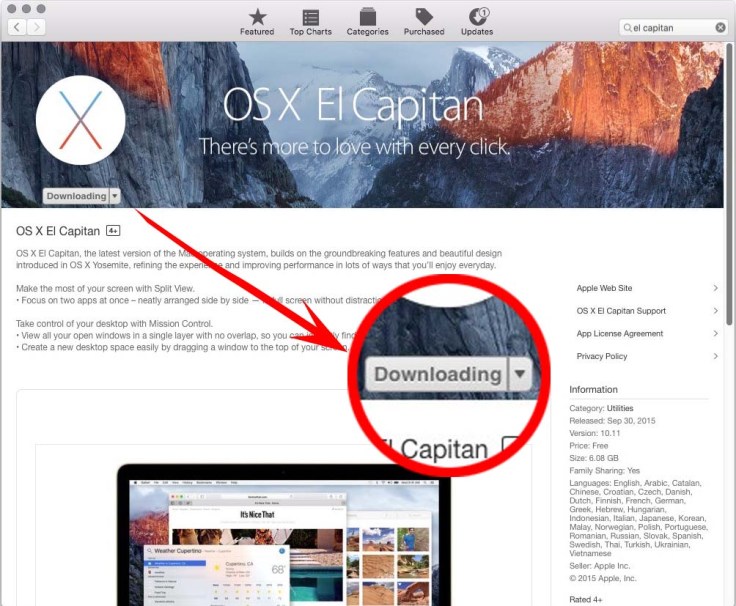
You can download OS X El Capitan from the Mac App Store.
This will download 6.1 GB file called “Install OS X El Capitan” to your Applications folder.

Format USB Drive
format the USB drive by opening up Disk Utility. It’s in the Utilities folder in Applications.
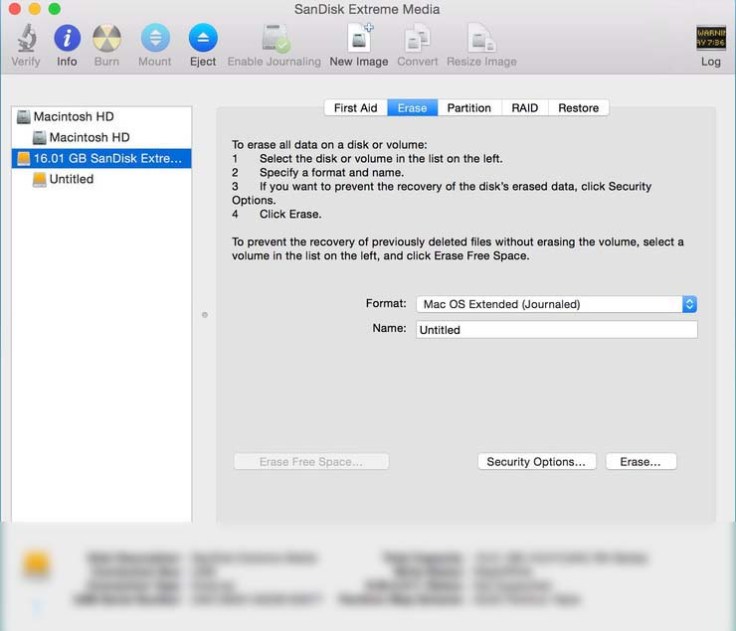
Select your USB drive and click on the “Erase” tab. Select Mac OS Extended (Journaled) as the format type and keep the name as “untitled”.
Click the Erase button. This will take a few minutes. your USB drive will be erased and formated with the proper file system.
➲ Quick tip: Easy Option is to Use DiskMaker X 5. (DiskMaker X just released its latest version 5, which is compatible with El Capitan.This is an easiest way to create a bootable copy of OS X)

Using Terminal
This method needs using the Terminal app. If you are not comfy typing commands into Terminal, simply use the DiskMaker X app (above).
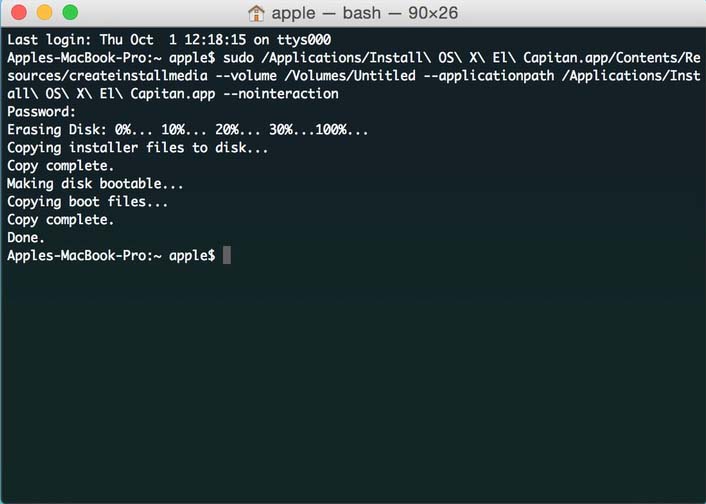
To continue, follow the steps below. After downloading OS X El Capitan to your Applications folder and formatting your USB drive (➲ Quick tip: make sure it’s named as”Untitled”) open up the Terminal app. Paste the following command into the Terminal window and hit return:
sudo /Applications/Install\ OS\ X\ El\ Capitan.app/Contents/Resources/createinstallmedia –volume /Volumes/Untitled –applicationpath /Applications/Install\ OS\ X\ El\ Capitan.app –nointeraction
You will be prompted to enter in your user password. Then, you’ll see a list of processes on the terminal screen that reads:
“Erasing Disk: 0%… 10%… 20%… 30%…100%…
Copying installer files to disk…
Copy complete.
Making disk bootable…
Copying boot files…
Copy complete.
Done.”
This method runs a special mode engineered into the OS X El Capitan installer that can create installable media.
The process takes less time than DiskMaker X, however you’ll have to follow the directions precisely. do not move the installer to a different folder, and check that you do not have any other devices connected to your Mac titled “Untitled”.
Booting up and Installing El Capitan
Once your USB drive has been created, it’s time to install El Capitan.
Restart your Mac and hold down the Option key immediately. When your Mac boots up, choose the USB drive that says “Install OS X El Capitan”
Select “Disk Utility” and then select your main hard drive. Press “Erase” on the volume. Remember, this will erase EVERYTHING on your machine.

Go back to the main menu and choose “Install OS X.” Select your internal hard drive when prompted and continue with the installation.
After installing OS X El Capitan, you can restore your programs and settings using either a Time Machine backup or Migration Assistant.
